Wednesday, 17 January 2018

CHAINED UP

Job Done! Bright but cold weather allowed me to get on with fitting the new timing chains etc. All went very well,  but I wouldn't have remembered where everything went without the help of the YouTube instructional video. With the jack shaft sprocket bolted on and and the crankshaft sprocket tapped all the way home, I got the chain around all three sprockets, still keeping my timing marks lined up. The only difficulty was that the spring loaded tensioners were supposed to be retained closed until a red plastic tab was withdrawn when it was bolted into position, but as I withdrew them from their plastic wrappings they sprung apart. I did find that you could compress the spring and get it to stay compressed whilst I carefully bolted them into place. Picture below shows the left side chain in place


The next day I tackled the right side chain, which was simpler as there was only the crank and cam sprockets to wrap the chain around. I torqued all the bolts up to either 10 or 20 PSF only my small torque wrench was calibrated in Newton/Meters, but I found a comparison chart on line which showed 14 and 28 PSF respectively.


I fitted new paper gaskets and tapped in a replacement crankshaft oil seal and squirted plenty of silicon gasket glue onto the bottom of the timing cover where it would seal against the sump pan. Carefully positioning the cover ensuring that I didn't damage the the head gaskets between the heads and the top of cover, I gently coaxed the cover into place with the help of my little plastic hammer. Seven bolts to the sump, four to the underside of the heads and 10 into the crankcase. It was then that found that the two bottom bolts were too short and wouldn't tighten up. so 2 slightly longer bolts have been ordered. Finished.


Obviously not finished as the next day whilst I tidied up I spied the oil deflector that should have been fitted over the crankshaft in front of the two sprockets, on my work bench. I swore, but there was nothing for it, the cover would have to come off. With deflector in place it only took about half and hour to get all back into place and bolted up tight. Now I can start on the  brake callipers.

Tuesday, 9 January 2018

TIMING CHAIN REMOVAL

Christmas and New Year celebrations at last all over and I couldn't wait any longer to get back into the garage. It was too cold to contemplate keep putting my hands into a bucket of cold water whilst using wet 'n' dry emery paper to rub down the red Hammerite in the engine day and as I had already removed the crankshaft bolt, I decided to get on with replacing the timing chains, guides and sprockets.

I pushed the car far enough out of the garage so I could spray on degreaser to the front of the engine and bay and after vigorous brushing I gently hosed it clean. I downloaded the Rimmer Bros., YouTube timing chain instruction video onto my computer which I set up on the scuttle and I was ready to go.


First off was the air cleaner, carb elbows and cam covers, exposing the cams, the picture was taken after the chain and cam sprocket were removed.


The numerous bolts securing the timing chest cover are all different lengths so I inserted then into a piece of cardboard in the right order to ensure they went back into the correct holes.


The tricky bit is separating the bottom of the cover from the sump gasket, I did as shown in the video with a scalpel, but still manage to leave a short length attached to the cover when I tapped it loose, hopefully some silicon gasket sealer should ensure an oil tight seal on reassembly.


I followed the video procedure, using tippex to highlight the essential timing marks,the cloth at the bottom is to ensure nothing falls into the sump whilst I undo all the bits and bobs. I started to remove tensioners, sprockets, chains and guides on the right side with no problems

The left side removal was a little more complicated as the jack shaft sprocket nut was reluctant to undo, but using the same procedure for undoing the crankshaft bolt, it came loose and now only the two crankshaft sprockets had to be removed. using my large puller they easily slipped down the shaft over the woodruff keys and now everything was off.


Now I could inspect everything, in fact the tensioner and guides seemed to show minimal wear with little extension to the tensioners, indicating very little stretch of the chains but there was damage to some of the teeth on the crankshaft sprockets and some scarring at the bottom of the inside of the cover, so I decided to replace everything. In the meantime I reseated the exhaust up pipe to manifold, it had obviously been blowing and I eventually realised the upstand protruding from the up pipe was preventing the flanges mating properly. I ground off a couple of mm from the upstand and with a bit of silencer glupe I now have a nice tight joint, which should considerable improve the exhaust note and stop the mild backfiring on overrun.


 The timing chain cover has been cleaned, but still have to remove the remaining bits of the old gaskets and all the new parts ordered, best quality German chains and properly hardened sprockets etc. should be here soon.

Monday, 18 December 2017

CRANKSHAFT BOLT

There was one aspect of my planned winter maintenance that was worrying me. To change the timing chains and sprockets I would first have to undo the big bolt that screws into the front end of the crankshaft. This bolt securely holds in place the drive belt pulley that powers the alternator and the power steering pump and also the viscous coupling to which the cooling fan is attached, the viscous coupling controls the speed that the fan revolves to no more that 2000 approx RPM irrespective of the crankshaft speed.

As you might expect this bolt is done up very tight, I think from memory 150PSI and as you might also expect takes a bit of undoing. My car is an automatic and that causes a problem as it is not possible to lock the crankshaft to stop it turning when trying to undo this bolt. The Stag Forum offers various solutions, to either lock the crankshaft or to shock the nut undone. Some of the suggestions I thought were a bit risky, so I opted for the tried and tested option, which required a very long lever and socket and a 18 inch Stillson wrench.


In the past when I needed extra leverage I slipped the handle of a long defunct bottle jack over the lever of my 1/2 inch socket set, effectively doubling it's length, but for this job I decided I needed the proper tool. My local motor accessory shop did me proud by selling me a 24 inch breaker bar from STAG TOOLS, how appropriate is that. The other tool needed is a very large wrench and although I tried all the nearby tool stores to no avail, I eventually got a decent second hand Record Stillson type wrench from an EBay seller.


The procedure was to adjust the Stillson as tightly as possible around the large circular part to the rear of the pulley block and with the handle resting on a block of wood which in turn rested on the chassis rail, the wood was to spread the load so as not to damage the chassis rail.


With the correct socket and the long leverage of the breaker bar apply the necessary pull to undo the bolt. The thing about a Stillson type wrench is that the more pressure you apply the tighter the teeth bite and without any drama, pings or sudden clicks the bolt just started to undo, brilliant.

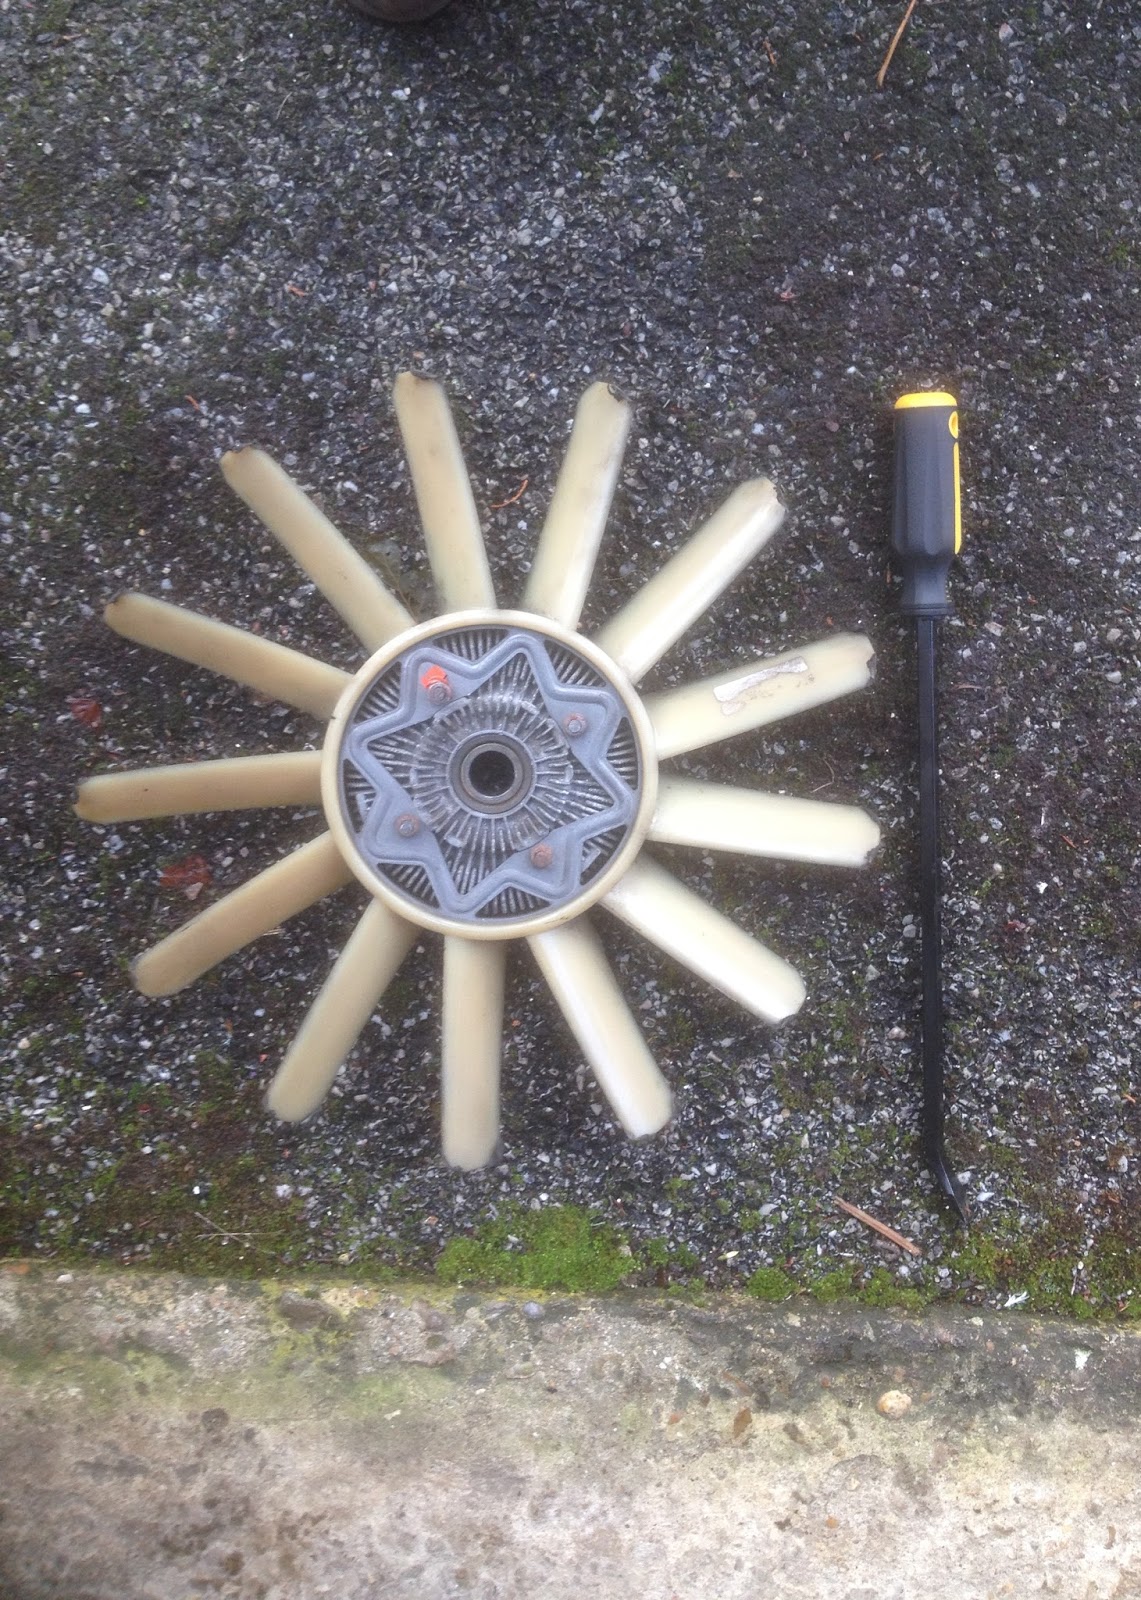
With the help of a long pry bar, the viscous coupling and fan blades easily slipped of the crankshaft.

For only the second time I deployed my large gear puller and again the pulley block easily slipped of the shaft, exposing the key left in the crankshaft and the corresponding keyway in the pulley.

 Nothing now preventing me from removing the timing chest cover in the New Year and replacing the timing chains. In between while I have been gradually rubbing down the red Hammerite paint on the right hand side of the engine bay, slow work but getting there, that is cold work, but I do want to complete this messy job before I do anything else.

Monday, 4 December 2017

WINTER MAINTENANCE

I'm a lucky fella, I was wondering how I was going to achieve my intended list of jobs on Stella, as my garage is too stuffed with, well, stuff to be able to get around her in the garage, when an empty garage suddenly became available four down from mine.

Stella is now reversed into this empty garage and I have just enough room to work around her. So work has begun. There are three jobs to do and they are all sort of connected. The main one is to strip the engine bay of all ancillaries, but not the engine, flatten down the awful red Hammerite paint that somebody painted over the original white paint and of course respray with Rover White paint. The second job is to refurbish the front brake callipers and the master cylinder and replace all the connecting pipework and hoses. The final job is to replace the timing chains,sprockets and tensioners.

Radiator, battery, steering pump, alternator, fuel pressure regulator, servo/master cylinder, screen washer bottle and all wiring and pipework has now been removed from engine bay and stored at the back end of garage


Just the last couple of bits and bobs to remove and then I can start rubbing down the red Hammerite. I will have to wait for warmer weather before I can spray, but there is no hurry.


I have also removed the front brake callipers, so time to order up stuff in readiness, Refurb kits for the callipers and master cylinder, timing chain etc. I already have the copper brake pipes so I can start bending them to the required shape. so plenty to be getting on with, Christmas activities allowing.

Sunday, 12 November 2017

NEW RADIO

I am making the most of the good weather as I can only comfortable work on Stella in the open, my garage being too full of shelves etc. When I removed the passenger door card for spraying the sill, I saw that the door speaker had several perforations, no doubt caused by clumsy screwdriver wielding. This would account for the very poor sound quality so I decided to replace both speakers and the old cassette player radio. The top photo shows one of the new Pioneer co-axial speakers alongside the punctured one, the bottom pic shows the old Clarian radio.


I chose a classic looking, but thoroughly modern radio, a Caliber, it had Bluetooth, auxiliary jack, microphone, and a removable front cover. In fact it had everything except decent fitting and operational instructions, but I was able to find relevant instructions on line.


Getting the old radio out was easy, it was held in place by a black crackle finished fascia plate and a couple of sprung plates The hole it came from was much larger than the radio I removed, it was obviously cut for the factory fitted radio.  I had to modify the plate to fit the new unit and in doing so ruined the crackle finish, so I sanded it right back and gave it a couple of coats of satin black, there was going to be so little of it exposed, it looked fine.


Connecting up the new radio was simple, I replaced the punctured speaker with one of the two new ones and switched on to try it out. Great, even connected automatically to my phone through Bluetooth and started to play my music, sounded great even with one of the original speakers still fitted. I went for a drive to check it out on the road and all was good at first, but gradually an interference kicked in, a bit like the comedian, Norman Collier's faulty microphone sketch. Unfortunately it got to the point it was impossible to listen to the radio, even when using the Bluetooth connection to my phone it was just as bad.


As soon as I turned off the engine all was fine. I checked all of the connections to no avail and then posed the problem to the Stag Forum. I immediately got two suggestions, the first was to by-pass the old bi-metal voltage regulator that supplies 10 volts to the instruments and fit a solid state one. It only cost £11 and I bolted it up under the dash and connected up the wires, sadly the problem persisted.


The other solution was too simple to be true, maybe, it was suggested, my choke cable was rubbing up against a spark plug lead and sure enough the choke and throttle cable were coming up through the tangle of HT leads. I re-routed them over the top of the servo vacuum pipe and immediately the interference stopped, Result! just got to fit the remaining speaker and another job ticked off. Changing the timing chains is the next job on the list, that should take up most of the winter months.

Thursday, 9 November 2017

NEW CARPETS

I got the left hand sill and door frame rubbed down and resprayed and the freshly polished trim all back in place and now it was time to fit the carpet. The carpet came from Coverdale and I opted for Polypropylene as the car is kept in a unheated garage which gets rather damp during the winter months, although I plan to put dehumidifiers packs inside the cabin this winter. The carpet was also having felt underlay attached in the necessary places, but when I unpacked it the top surface was rather fluffy with felt residue and I hoped this would easily vacuum off.

The front, back seats and seat belts had to be removed first and the floor pieces of carpet just lifted out, they weren't stuck down. the side and back pieces pulled away easily enough, with most of the glue being left attached to the metal work. I had to loosen the centre consul section so that I could pull out the tunnel section of carpet, now it was time for the clean up.

I eventually found that a kitchen scrub bud, one of those tangled pad of lathe turnings, cut through the old impact glue residue, although the paint did get a bit thin in a few stubborn places. After I vacuum it out I then washed down the whole floor area, mopped and rinsed and mopped again and a final vacuum.


I treated a few rusty spots with Kurust and then sprayed several coats of primer wherever needed. The main cable runs from back to front, ran in channels  set just below the door openings, so I reset the cables in these channels and gaffer taped them in place.


The first piece of carpet to be stuck in place was the rear heel board, no felt on this bit. I carefully masked off and sprayed the back of the carpet and the corresponding metal work with impact adhesive and gently positioned and smoothed out the carpet over the curves. Yep happy with that.


The next two pieces were for the sills, again no felt. I used the old bits as templates to mark and punch out holes for seat belts, I also needed to trim, no more than a centimetre from the edge to the front of the door opening. I first held the piece in place by the interior trim, lifted the carpet up and sprayed, waited a couple of minutes and pressed down, once glued, I unscrewed the trim and glued that bit down. I then replaced the long lengths of furflex trim/seal around the whole of both door openings, stood back and admired my handiwork and decided to call it a day.


The next day was still dry and warm and as before I used the old tunnel piece as a template for the various holes, handbrake, seat belts etc. I didn't glue this bit down as it would be held in place by the centre consul and seat belt fittings. It did take some tugging to get it tucked up under the consul and as you can see this bit was covered in felt residue.


One of the final bits was the centre section, that houses the seat belt fasteners and the ashtray, just visible in the photo, this was tricky, but got there in the end. all that was left was the small bits that covered the outer seat ridges and then the four large felt lined pieces that covered the floor.


The two front foot well bits did need trimming so that would tuck up neatly under the pedals on the right side and under the parcel shelf on the other side. A good vacuum and wow, it looked good, especially when all the seats were back in and as Ed China would say "JOB DONE".

Wednesday, 6 September 2017

COSMETIC OIL

I checked my notes and saw that it was time for an oil and filter change, up on the ramps and all done with minimal spillage.At some point I will convert to a be able to use a 'spin on' filter, but at the moment I still have to undo and remove the canister that holds the filter and give that a thorough clean before inserting the new filter and carefully bolting it back into place ensuring it sits correctly onto the new rubber sealing ring.

The bright, calm days continued and prompted me to start on tarting up Stella. I had a nasty surprise when I went to a couple of specialist car sprayers and asked what it would cost for a respray, provided I stripped all the trim, door handles, lights, bumpers etc, both estimates, allowing for a couple of wheel arch repairs were five thousand pounds. Three thousand was what I had in mind, but that was from watching two many episodes of Wheeler Dealer that were probably recorded ten years ago.

Generally the panels are OK its around the trim edges where black mastic has been used and the lower sills so I decided I would have ago with spray cans. I started on the drivers side sill, there was no rust, it just looked very cruddy and the slim stainless trim that ran the length of Stella was already starting to flap about.


 As well as this piece of trim, I removed the TRIUMPH engraved tread plate that had also been stuck down with black mastic and the stainless section that holds the carpet and fuzzy rubber door seal in place and then peeled back this rubber seal. I cleaned all the gunge away, thoroughly rubbed down with 600 wet and dry paper, filled the surface cracks and rubbed down again with 1000 grade paper.


I carefully masked up with newspaper and applied two coats of white primer. The next day I again rubbed back with 1000 grade paper, I made sure all residue was wiped away and sprayed on three coats of Rover White. I carefully removed the masking tape and news paper. I waited a couple of days for the paint to harden during which time I cleaned and polished the trim and then fitted it back into place with new clips and screws. Not bad even if I say so myself, trouble is, it now makes the other side look so much worse, but it will get done in time.


A previous owner had also used black mastic behind the door handles and as elsewhere this was drying and coming away so I decided to remove the handle and fit a proper black rubber gasket behind it. I quickly realised that I would have to remove all of the locking mechanism to get at one of the bolts holding the handle to the door skin, a deep breath and I unclipped the operating rods and unbolted the lock, hoping I woild be able to get it all back in. Handle removed and all the gunge cleaned off the handle bolted easily back onto the door looking so much neater, but it took a couple of goes to get the lock mechanism operating correctly. When I come to do the same to the passenger door it should be so much easier.